
Building the Off-Road Overlanding Camper!
CLICK HERE TO WATCH THE FIRST OF TWO BUILD VIDEOS!
CLICK HERE TO WATCH THE TWO YEAR WALK AROUND VIDEO!

CLICK HERE TO WATCH THE SECOND OF TWO BUILD VIDEOS!

CLICK HERE TO SEE PICTURES OF THE OFF-ROAD OVERLAND CAMPER IN ACTION!
In September of 2017 I decided that I was going to build an Off-road capable camper that could sleep my family of 5 on Overlanding trips. At some point while diving into the deep dark corners of the interwebs I had seen a van that had a tonneau cover for the roof so they could open the roof if they wanted. For some reason this image had been hiding in the back of my mind for who knows how long. At this point in time i also happen to have a tri-fold tonneau cover for a 2010 F250 sitting in my workshop that a friend had given me. By some stroke of luck that day while thinking about a trailer design I happen to remember the van while looking at the tonneau cover at the same time. It was at this point that the idea of a Poptop came to mind. I had planned on using the tonneau cover as the roof and use struts to lift it up at around a 30-40 degree angle to make the pop top and if I wanted i could remove the vinyl and have a view of the sky. Like most initial concepts this quickly fell by the wayside and the tonneau cover that was the origin of the entire design was quickly abandoned, but the idea locomotive was full steam ahead!
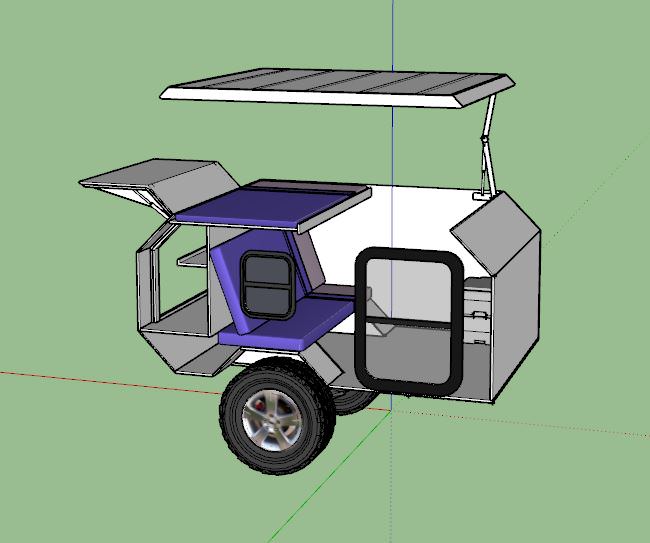
I spent many hours in google sketchup making different models trying different layouts to accommodate my family of 5. After many iterations, this is the design I settled upon before I got started. Although the design didn’t have all of the details worked out, it was enough to get me started and I would figure the details out as I went.
I started the project by building the wooden body first. Every other trailer build I have seen, the builder starts with the trailer and then builds his camper piece by piece on top of the trailer frame. I had a few reasons that kept me from doing it this way. The first was the location of my tools. I have a really nice and well equipped woodshop and it seemed that it would be a lot easier on me to build it in a climate controlled shop with all of my tools at my finger tips. The second reason was that I was planning on using an old trailer I already had at first, with hopes to build a new trailer with a better suspension in the future. The last and most important reason was that I wanted to fiberglass the entire body to make it waterproof. I wasn’t sure how I could do this if the body was already mounted to the trailer. Although this method has been questioned a lot, I still stand by my decision.
Building the Camper Body

The body build went extremely fast. It was as simple as laying out the design on the plywood and using my tracksaw and then screwing the panels together. For the initial build I simply predrilled into the plywood and attached it all using screws. Once the body was completely assembled and I was happy with the layout I went back and glued in corner blocks into all the inside corners for a more permanent bond. It was extremely satisfying to see the trailer take shape. The table I was building the camper on happened to be close to the actual planned ride height of the finished trailer so I couldn’t resist bringing in a tire to get a sneak peak at how it would look.

Once the body was built it was on to the difficult task of making the pop top. This has proved to be the most difficult part of the entire build and I am still considering making a radical design change to the current iteration. There are many forces going on during the lifting and lowering process as well as from the wind when in the upright position, so it isn’t as simple as it may seem.

In this picture I had temporary supports holding the top up as I worked out measurements and geometry. I wanted a system that didn’t require much effort to lift but also didn’t require much force to lower. After ordering many different lift arms, i finally got a combination that seemed to be right and I finally had a working pop top.
Fiberglassing the Camper

With the body work finished, it was time to start focusing on waterproofing and paint. I started off by disassembling the roof and lift arms and started fiberglassing. Over the years i have had done several projects that involved fiberglass. When I was 19 I built a sailboat and many times in high school and in college i built sub woofer boxes for my self and friends. The one thing I have come to realize about fiberglass from all these projects is that I HATE FIBERGLASS! It stinks, its difficult to work and the glass fibers get everywhere. It has been almost a year since I laid the fiberglass on the camper and i am still itching from glass fiber when i work in my shop! As much as I hate fiberglass, I can’t think of a better way to waterproof an off-road camper. It is waterproof and flexible, what more can you ask for.

When it came to paint, i wanted a durable finish. For this reason I chose tractor paint. It is an oil based product that is extremely durable and meant for a piece of equipment that sits outside its entire life. The only downside is that it only comes in certain colors. For my project I chose Massey Ferguson Gray. For the roof, fender wells and bottom of the trailer, I wanted added protection. For these areas I sprayed U-POL Raptor Liner on top of the fiberglass. It created a durable rubberized layer, but it takes a lot to build up any amount of thickness.
Building the Trailer Frame

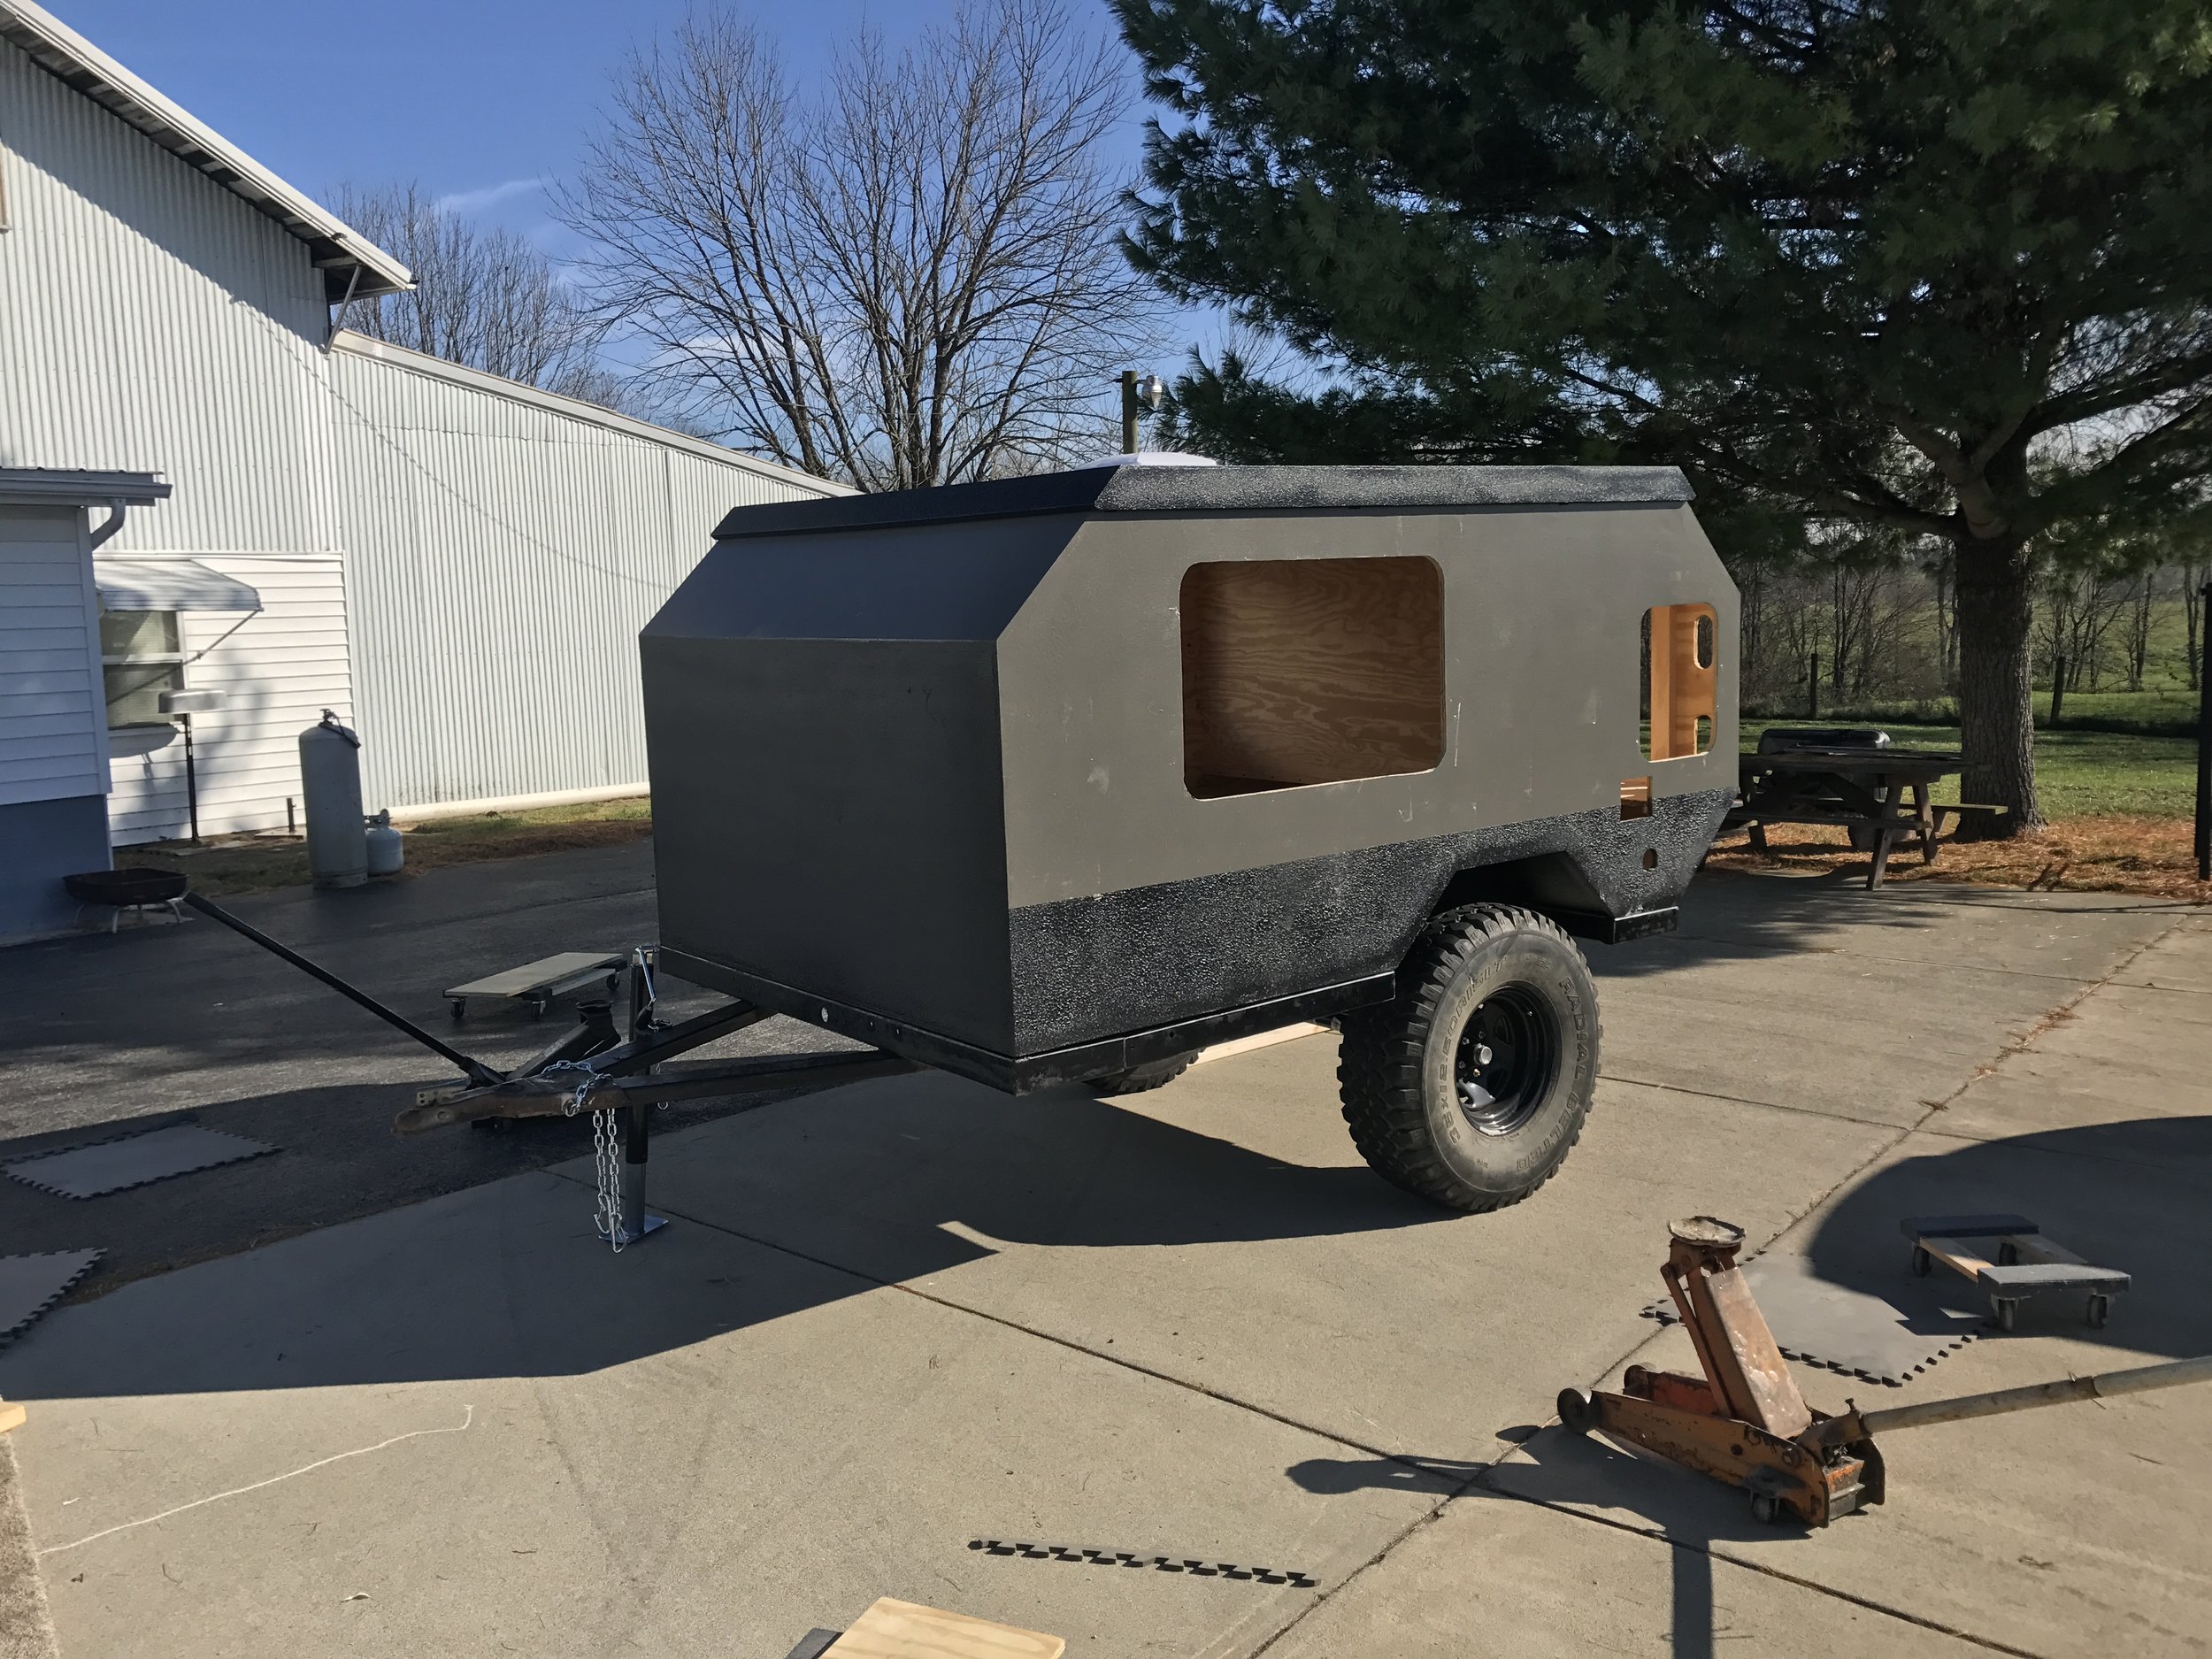
At this point, I turned my attention to the trailer. I had an existing trailer that I was going to use, but it needed a new axle and would require a lot of modification to make it fit the camper body. I ordered an axle with a hub to hub spacing that matched my XJ so the tires would follow in the same tracks as the Jeep. This worked good for the Jeep, but now that I have sold the jeep, it doesn’t really matter. I also ordered an axle with brakes. The jeep brakes didn’t work very well as it was with the big tires and with a trip to Colorado planned I didn’t want to be coming down a 13,000 foot mountain towing a 3000lb trailer relying on the jeep’s brakes alone. Once all the welding was finished, the brakes were installed and the tires were mounted it was time to carry the camper body out of the workshop and bolt it onto the trailer frame. After getting the body mounted i installed the doors and windows. Although it was far from finished at this point it was usable and that is just what I did. The next day, my son and I took it on its maiden voyage. We slept on the floor, but we had a roof over our head!

Adding Heat to the Trailer

Now that the easy part was done, it was time to finish the build. A lot of people look at me strange when I say this, but I had it from non existent to the point you see above in around a month. It then took me another 6 months to finish all the details. With it getting close to winter, my first priority was to get a propane tank and heater installed. Now that I was no longer able to fit the camper in my woodshop, that meant I would have to finish the rest of the work in the garage portion of my workshop that wasn’t heated, so having a heater in the camper would also make it easier to work. I installed a wall mount Wave 6 Catalytic safety heater. This heater doesn’t blow hot air around, it produces radiant heat. I chose this type of heater due to safety reasons. That being said, I also have 2 CO detectors, I know that 2 is probably overkill, especially since with the fabric pop-top we are well ventilated but I am carrying very precious cargo and I want to make sure they wake up in the morning! I have been very pleased with the Wave 6, I would say the only issue is keeping it from over heating the space.
Sleeping Sideways

I also wanted to get the bed installed so I wouldn’t have to sleep directly on the floor for the next trip. In my design, everyone would be sleeping perpendicular to the direction of the trailer as opposed to parallel like every other teardrop type trailer I have seen, luckily we are a short family. What I wanted was a couch that converts to a bed, it has proved nice to have a place to sit down and rest while camping. I constructed the bed from a series of 1x2’s with every other one being attached to a separate frame. This way they would slide between one another and effectively double the size of the platform if one frame was pulled out. I installed the bed into the camper using a piano hing in the back and allowing the sides to rest on the fender wells. The fender wells offer more than enough support for the bed when it is couch mode. Eventually drawers that go under the bed would act as a support when the bed was pulled out, but at this point I fabricated 2 flip down legs to support the bed so that I could continue using the camper.
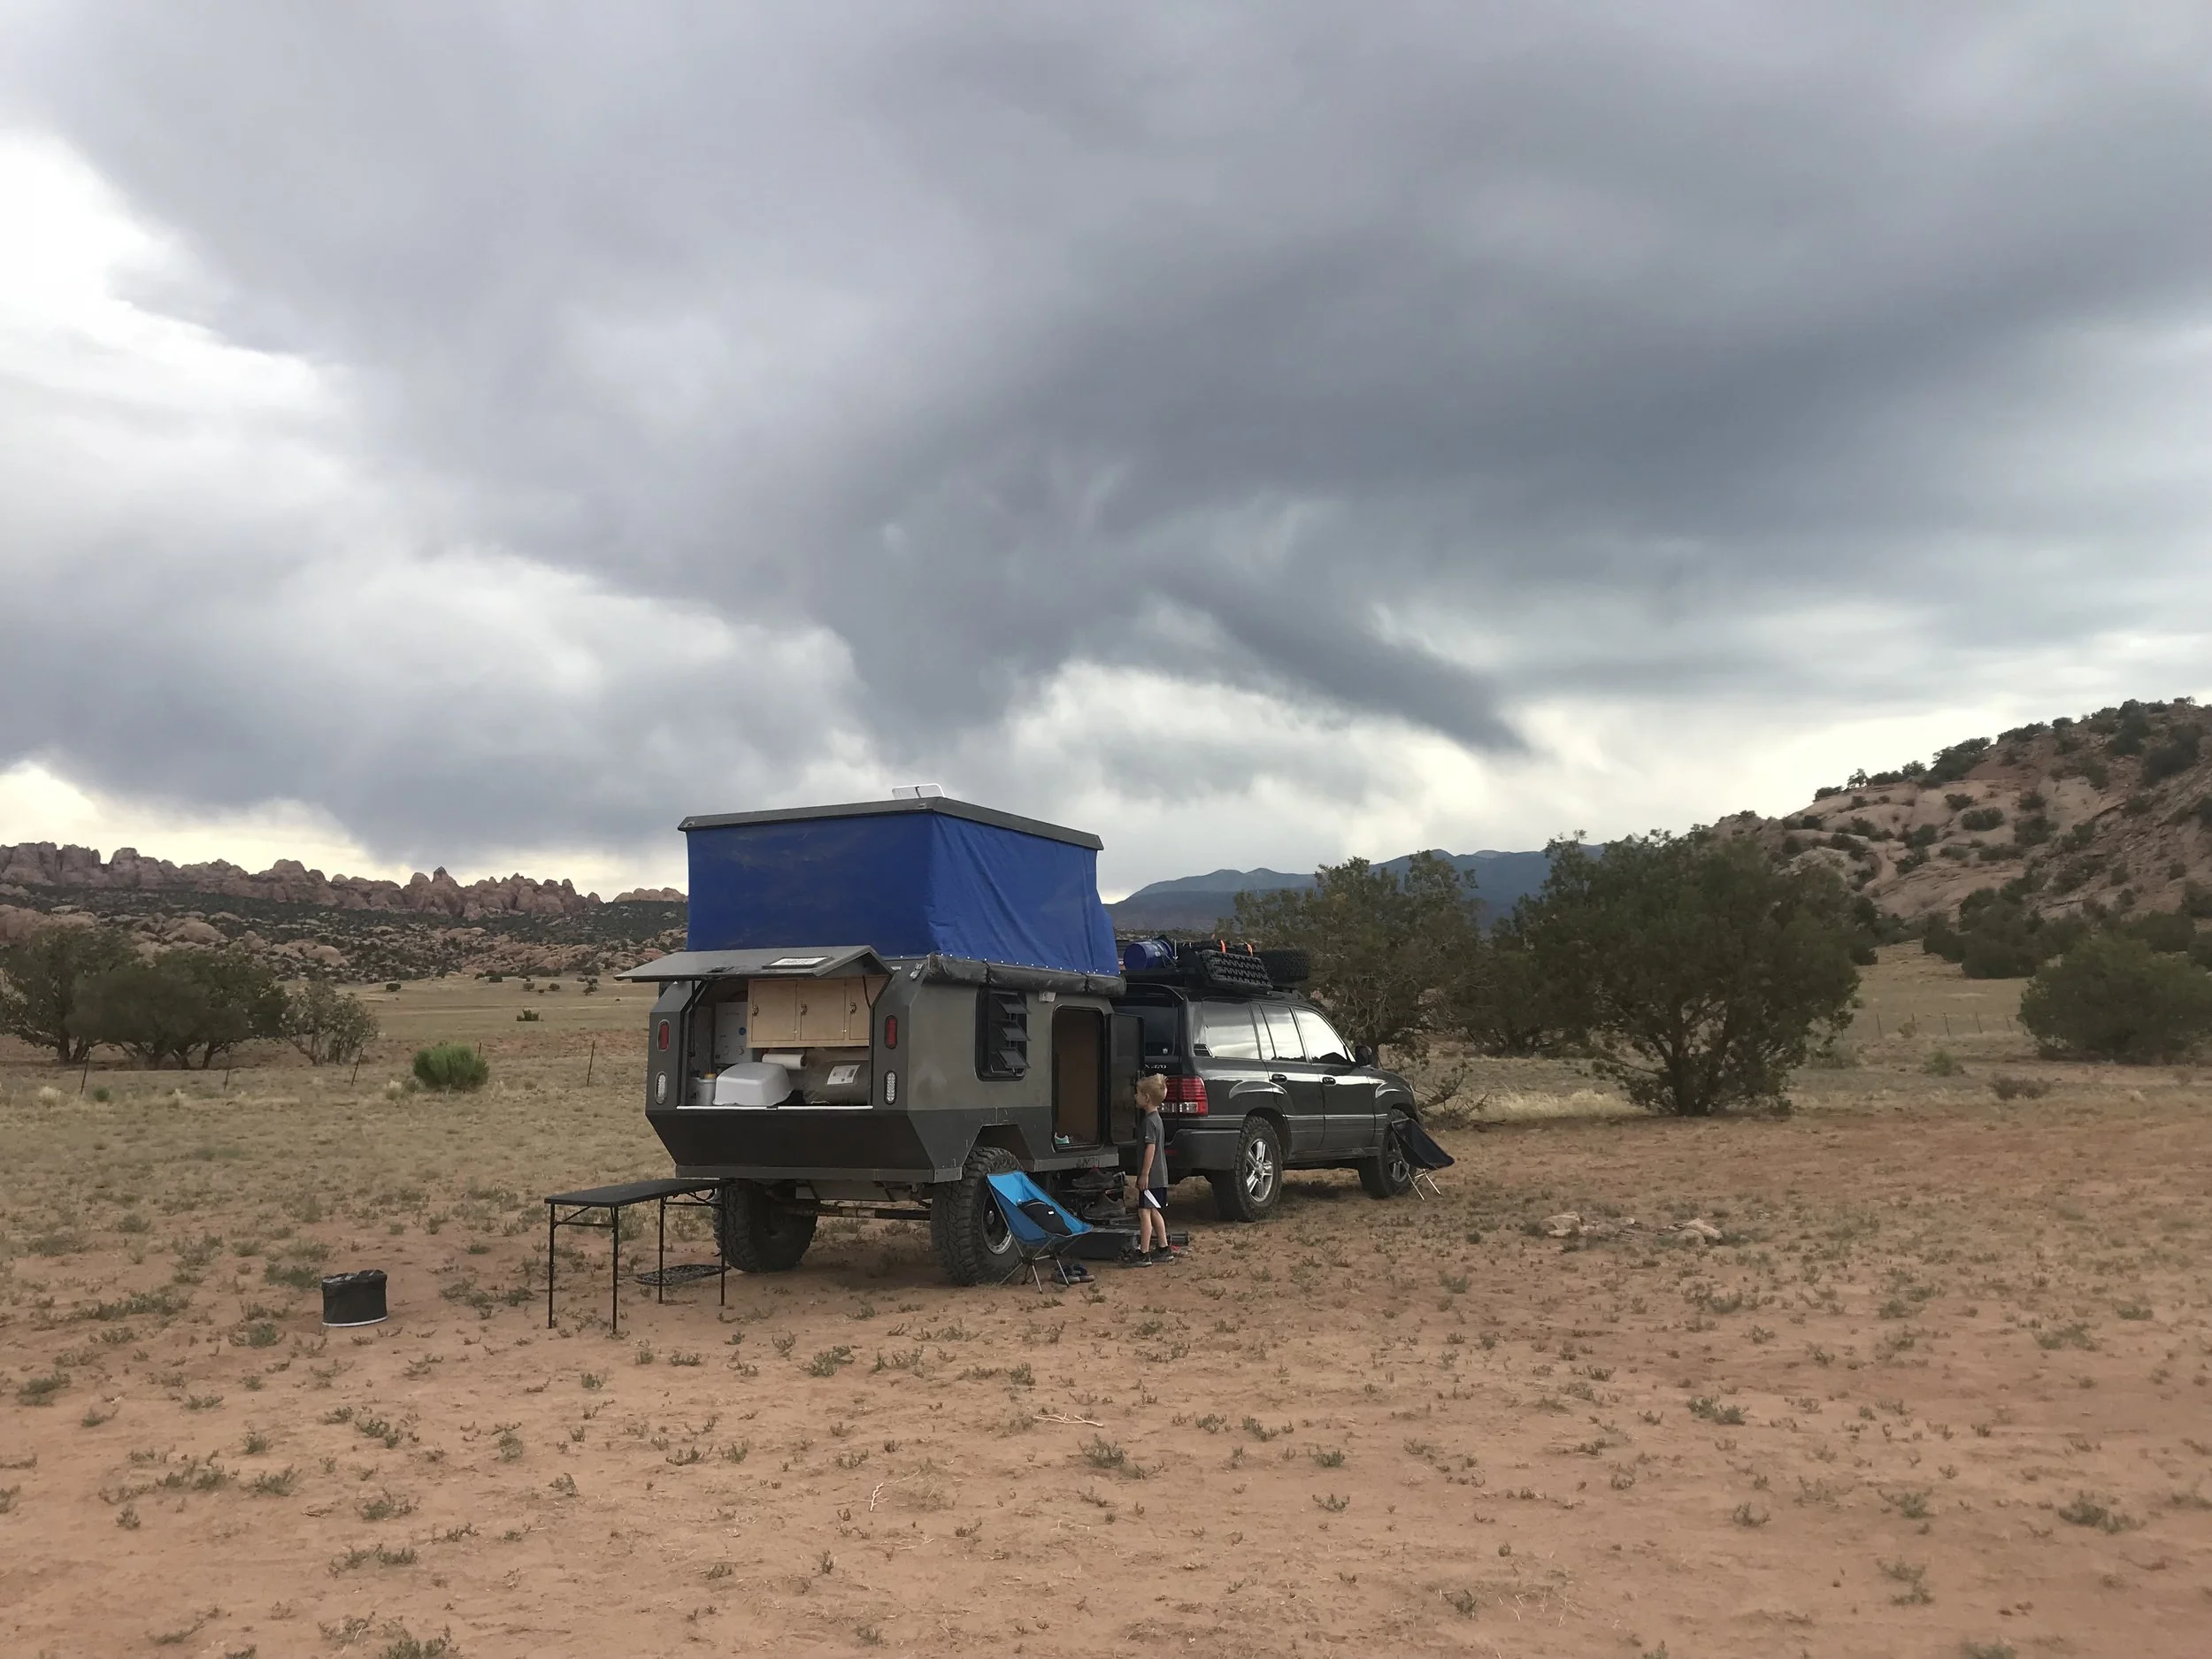
Putting the Off-road Overland Camper to the Test

At this point, it was time to take the camper on its next trip! This would be a real test of the capability of the trailer as we were taking it on what is referred to as the Kentucky Adventure Tour which has several difficult 4x4 trails. It was also early January and the weather was forecast to be 0F which it was!